
So you want to open Browser Windows?
JavaScript Does Windows...
Where you Want Them, How big You Want Them, and with What Browser Buttons You Choose...
After this lesson you will be able to:
Note: If you do not have the working documents from the previous lessons, download a copy now.
In lesson 25, we learned how to add a TARGET option to a hyperlink so that a mouse click would load the link in a new browser window. You may have noticed that this second window opens with the same web browser buttons and fields as the original window, and that it is usually the same size as that first window.
With JavaScript we can write code that creates a new window of arbitrary size, and we can instruct it not to display the URL field or the web browser navigation buttons. Furthermore, for 4.0 version web browsers, we can even specify where the window should appear on the screen.
Why would we want to do this? If we are doing something like loading an image in a new web browser window, there is no real need for all of the browser buttons and fields, which take up valuable screen real estate. Furthermore, it allows us to create small web browser windows that can work like "tool palettes" in other computer programs.
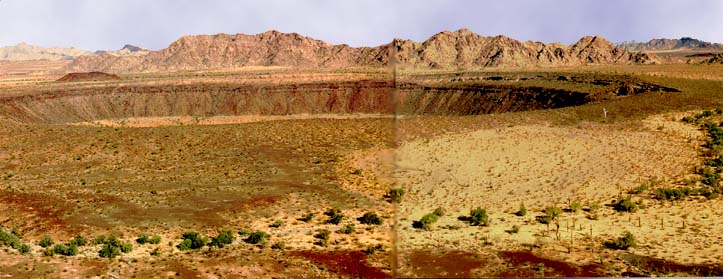
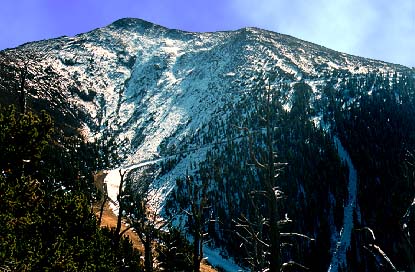
Look at this photo of a crater in Mexico that opens in long skinny window or this one of a volcanic mountain in Arizona that opens in a window that fits the image. Finally, try looking at our pink JavaScript bottle in a small window that displays browser buttons.
The general JavaScript approach to writing this code looks like:
  <a href="URL"
  onClick="window.open('URL', 'window_name', 'window_options'); return false">
  linking text</a>
where URL is the URL for the image that we wish to display in this new window. As we saw in lesson 27a we use the same URL in the href part and include a return=false in the JavaScript onClick code just in case the person looking at our page has a browser that does not understand JavaScript. In this case, the link tag will jump to a page that displays the picture by itself in a full web page.
The onClick JavaScript event initiates the action; a command called window.open() that talks to the web browser and tells it to open a new window. The window is filled with the content specified by the URL in the first parameter, which in the above examples was an image file, but could also be a local HTML file or a remote URL. The second parameter provides a "name" for this window, in case we use it again to target a link (see lesson 25).
The third parameter is where we list all the options that indicate how the window will appear. These items are all in one string of text enclosed in quotes:
You can list the first seven as OPTION=yes or OPTION=no to indicate that we want them to be used or not used in our newly opened window, separating each by a comma. For example:
  I have provided a sneak peek of
  <A HREF="myimage.gif"
  onClick="window.open('myimage.gif', 'myWin',
  'toolbar=no, directories=no, location=no,
  status=yes, menubar=no, resizable=no, scrollbars=no,
  width=300, height=200');
  return false"
  >my image</a> for you to see.
will create a link to open an image file myimage.gif in window named "myWin", that shows no browser buttons, and is pretty much a fixed window size; you cannot resize it or scroll it.
On the other hand, we could link to a URL in a new window:
  How about trying the best
  <A HREF="http://www.mcli.dist.maricopa.edu/tut/"
  onClick="window.open('http://www.mcli.dist.maricopa.edu/tut/',
  'myWin', 'toolbar=yes, directories=no, location=no, status=yes, menubar=no,
  resizable=yes, scrollbars=yes, width=500, height=400'); return false"
  >web page tutorial in the universe</a> for free!
This code provides the browser navigation buttons (but not the extra directory ones) and the URL display field. The window is opened at a window that is 500 pixels wide and 400 pixels high, and we allow the viewer to resize it and the window will have scrollbars activated.
You can write these options more compactly by just listing the ones that you wish to activate; the browser assumes the ones not mentioned are turned "off". For examples, here is the alternative way to write the two examples above:
  I have provided a sneak peek of
  <A HREF="myimage.gif"
    onClick="window.open('myimage.gif', 'myWin',
    'status, width=300, height=200'); return false">my image</a>
    for you to see.

   How about trying the best
   <A HREF="http://www.mcli.dist.maricopa.edu/tut/"
     onClick="window.open('http://www.mcli.dist.maricopa.edu/tut/',
     'myWin',
     'toolbar,status,resizable,scrollbars,width=500,height=400');
     return false">
     web page tutorial in the universe</a> for free!
With the 4.0 versions (and later) of NetScape and Internet Explorer browsers, we can also, through JavaScript, specify the location on the screen that the window opens. These dimensions are given in pixels, measured horizontally and vertically down from the top left corner of the screen. Older web browsers will just ignore these options.
Unfortunately, NetScape and Internet Explorer use different names for these options! So to make it work on both browsers, you must specify the settings twice:
Adding on to our earlier example, This code will tell 4.0 version web browsers to place the window 100 pixels over and 75 pixels down from the top left corner of the viewer's screen:
  I have provided a sneak peek of
  <A HREF="myimage.gif"
  onClick="window.open('myimage.gif', 'myWin',
  'status, width=300, height=200, screenX=100,screenY=75,left=100,top=75');
  return false">my image</a> for you to see.
We will soon move on to our Volcano Web example for creating custom window openers. To date, we have written small JavaScript segments that are added to hyperlink tags or embedded into the body of a page to write dynamic content. For a task like opening windows to display a series of images, it makes sense to write a generic chunk of JavaScript code that can do this task, and all we have to tell it is which picture it should load. This is the purpose of a JavaScript function, a block of code we can re-use as much as we need to perform a similar task.
The typical place to write JavaScript functions is to put them into the non-display part of our document inside the <HEAD>...</HEAD> tags. This way, we can load the "brains" of our JavaScript into the web browsers, and then call it as we need from our document.
For our Volcano Web site, we are going to modify the page that discusses Volcanoes from the USA. We have a link from a small picture of a seismometer that loads a larger verson of that image into a separate web browser window (using the TARGET attribute of the hyperlink tag). We will add some links to this document that display pictures of other Volcano landforms, and we will use JavaScript to load these images into a new window.
But rather than just loading a picture in a window, we want to tell JavaScript, "Here is the image file, a title, and a caption; please load a new web browser window with the image and write some caption text on the bottom of the page". So we will use JavaScript to create the new window and then write dynamic content to that window from a template. We want this ability to be written as a function, so we can use it for 4 different images.
<head>
<title>Volcanic Places in the USA</title>
and
</head>add this JavaScript function:
<SCRIPT LANGUAGE="JavaScript">
<!-- hide this script from old browsers
// This script opens a new browser window and writes
// HTML to display an image with a title and caption
function show_photo( pFileName, pTitle, pCaption) {
// specify window parameters
photoWin = window.open( "", "photo",
"width=600,height=450,status,scrollbars,resizable,
screenX=20,screenY=40,left=20,top=40");
// wrote content to window
photoWin.document.write('<html><head><title>' +
pTitle + '</title></head>');
photoWin.document.write('<BODY BGCOLOR=#000000 TEXT=#FFFFCC
LINK=#33CCFF VLINK=#FF6666>');
photoWin.document.write('<center>');
photoWin.document.write('<font size=+3
face="arial,helvetica"><b>' +
pCaption + '</b></font><br>');
photoWin.document.write('<img src="' +
pFileName + '"><p>');
photoWin.document.write('<font face=
"arial,helvetica">');
photoWin.document.write( '"' + pTitle +
'" photo © Lorrie Lava<br>');
photoWin.document.write('<A HREF="mailto:
lava@pele.bigu.edu">
lava@pele.bigu.edu</A><br>');
photoWin.document.write('Volcanic Studies,
<A HREF="http://www.bigu.edu/">
Big University</A>');
photoWin.document.write('<p></font>
</body></html>');
photoWin.document.close();
// If we are on NetScape, we can bring the window to the front
if (navigator.appName.substring(0,8) ==
"Netscape") photoWin.focus();
}
// done hiding from old browsers -->
</SCRIPT>
If you would like to copy and paste this code, use this sample of HTML that will load in a new browser window.
Our function is named show_photo; when we use it in our pages, we will send it three pieces of information listed as the variables pFileName (the URL for the image file), pTitle (a string of text for the title of the web page we will create via JavaScript), and pCaption (a short caption to display below the image). These three items can be different every time we use it but are represented in our function by their variable names.
We then use the window.open function to create a window that is 600 wide by 400 pixels high; note that unlike our earlier examples, the first parameter for this function, the window URL, is empty. That's because the page that will fill the window does not exist. In fact, we will use the document.write function in the subsequent lines to write the entire contents for that page. By using the notation photoWin.document.write, we are telling the web browser to write the content to the new window using the template provided. Note that near the end, we let the browser know we are done by the code photoWin.document.close();
The last little bit is some special code that allows our function to tell NetScape browsers to bring this window in front of any other web browser windows (This function is not yet available to Internet Explorer browsers).
As it stands now, we only have built the functionality for our window opener. We will now create the code that "calls" the function:
<a href="../pictures/seismo.jpg" target="photo">with this new code:
<a href="'../pictures/seismo.jpg"
  onClick="show_photo('../pictures/seismo.jpg', 'Field Seismometer',
  'Volcanic Tableland, Long Valley, California'); return false"
  onMouseOver="window.status='view a large image of a field seismometer';
  return true">
NOTE: We use the onClick event to trigger a call to our JavaScript function. The picture to load in the new window is seismo.jpg, the title for the new page is Field Seismometer, and the caption to be placed at the bottom is Volcanic Tableland, Long Valley, California. If our function works, it will generate a web page in a new window that contains this information in the format specified by our function.
We also use the onMouseOver event to control the display in the status bar when the user moves the mouse over this link (see lesson 27a)
When you click on either the postage stamp image of the seismometer or the hypertext link below it, a new web browser window should appear, and the larger picture is displayed in a black background page with yellow text (you may have to scroll down to see the caption). If it did not work, compare it to the sample web page for this part of this lesson.
We will now demonstrate the usefulness of writing JavaScript functions-- using the same code for different content. In our previous versions of the document we have been working on, usa.html the link listed under Mount St Helens went to another web page, msh.html, which had only one sentence and a link to an image. We will no longer use this second web page, and instead, we will modify our first page to just display this image in a new browser window.
<td valign=top>On May 18, 1980, after a long period of rest,
this quiet mountain in Washington provided
<a href="msh.html">detailed observations</a> on
the mechanics of highly explosive eruptions.
</td>
to read:
<td valign=top>On May 18, 1980, after a long period of rest,
this quiet mountain in Washington provided detailed observations on
the mechanics of highly explosive eruptions. The towering pine trees
of this once-quiet mountain were <a href="../pictures/msh.gif"
onClick="show_photo('../pictures/msh.gif', 'Trees Toppled',
'Mount St. Helens Blast Area'); return false"
onMouseOver="window.status='view a photo showing the strength of the eruption';
return true"> toppled over like toothpicks</a>.
</td>
NOTE: We are using the same JavaScript function that we wrote for the link to the seismometer image to display a different image title, and caption for the Mount St. Helens picture.
But let's not stop here! We will add two more description sections to this document, and use our JavaScript function to display two new volcano images.
<tr>
<td>
  <font size=+1><B>
  San Francisco Peaks
  </B></font>
</td>

<td colspan=2>
  <font size=+1><B>
  MacDougal Crater
  </B></font>
</td>
</tr>

<tr>
<td valign=top>Scientists believe that the volcanic eruptions
several million years ago that shaped
<a href="../pictures/agassiz.jpg"
onClick="show_photo('../pictures/agassiz.jpg', 'Mount Agassiz',
'San Francisco Peaks, Arizona'); return false"
onMouseOver="window.status='view an image of a volcano in Arizona';
return true">this mountain in northern Arizona</a>
were very similar to the ones observed at Mount St. Helens.
</td>

<td valign=top colspan=2>
When hot volcanic magma encounters ground water,
these explosive eruptions can
form <a href="../pictures/macdougal.jpg"
onClick="show_photo('../pictures/macdougal.jpg', 'MacDougal Crater',
'Pincate Volcanic region, Mexico'); return false"
onMouseOver="window.status='view an image of a volcanic crater in Mexico';
return true">deep craters</a> seen just south of Arizona in
the Pincate Volcanic region of Mexico.
</td>
</tr>
  Listed below are places in the United States that are considered
  "active" volcanic areas.
(remove the word "two")
If all works well, you will have four different links that reference the same JavaScript function to generate different content!
Compare your web pages with this sample of how it should appear. If your pages are different from the sample or the hypertext links do not work correctly, review the text you entered in the text editor. Note that JavaScript is very sensitive to typographical mistakes -- one missing quote or semi-colon can ruin the page! Make sure to check that you do not have extra RETURN characters inside your JavaScript statements.
Review topics for this lesson:
Use our custom window opener in your own web pages. See if you can update the format for the HTML that it writes dynamically.
What are some purposes you might want to use a small window that opens from your site? Can it be used like a Navigation control?
It is our last JavaScript Dose... Swapping images in response to user interactions...
Writing HTML: Lesson 27c: A Wee Dose of JavaScript : Window Openers
©1994-1999
Maricopa Center for Learning and Instruction (MCLI)
Maricopa Community Colleges
The 'net connection at MCLI is
Alan Levine
Comments to levine@maricopa.edu
URL: http://www.mcli.dist.maricopa.edu/tut/tut27c.html